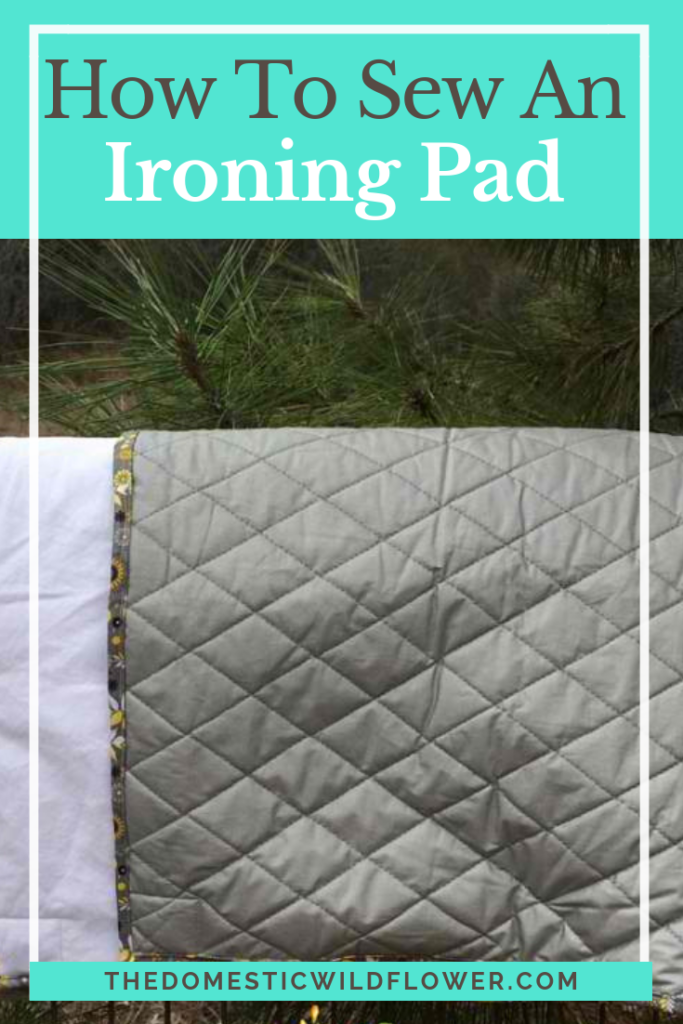
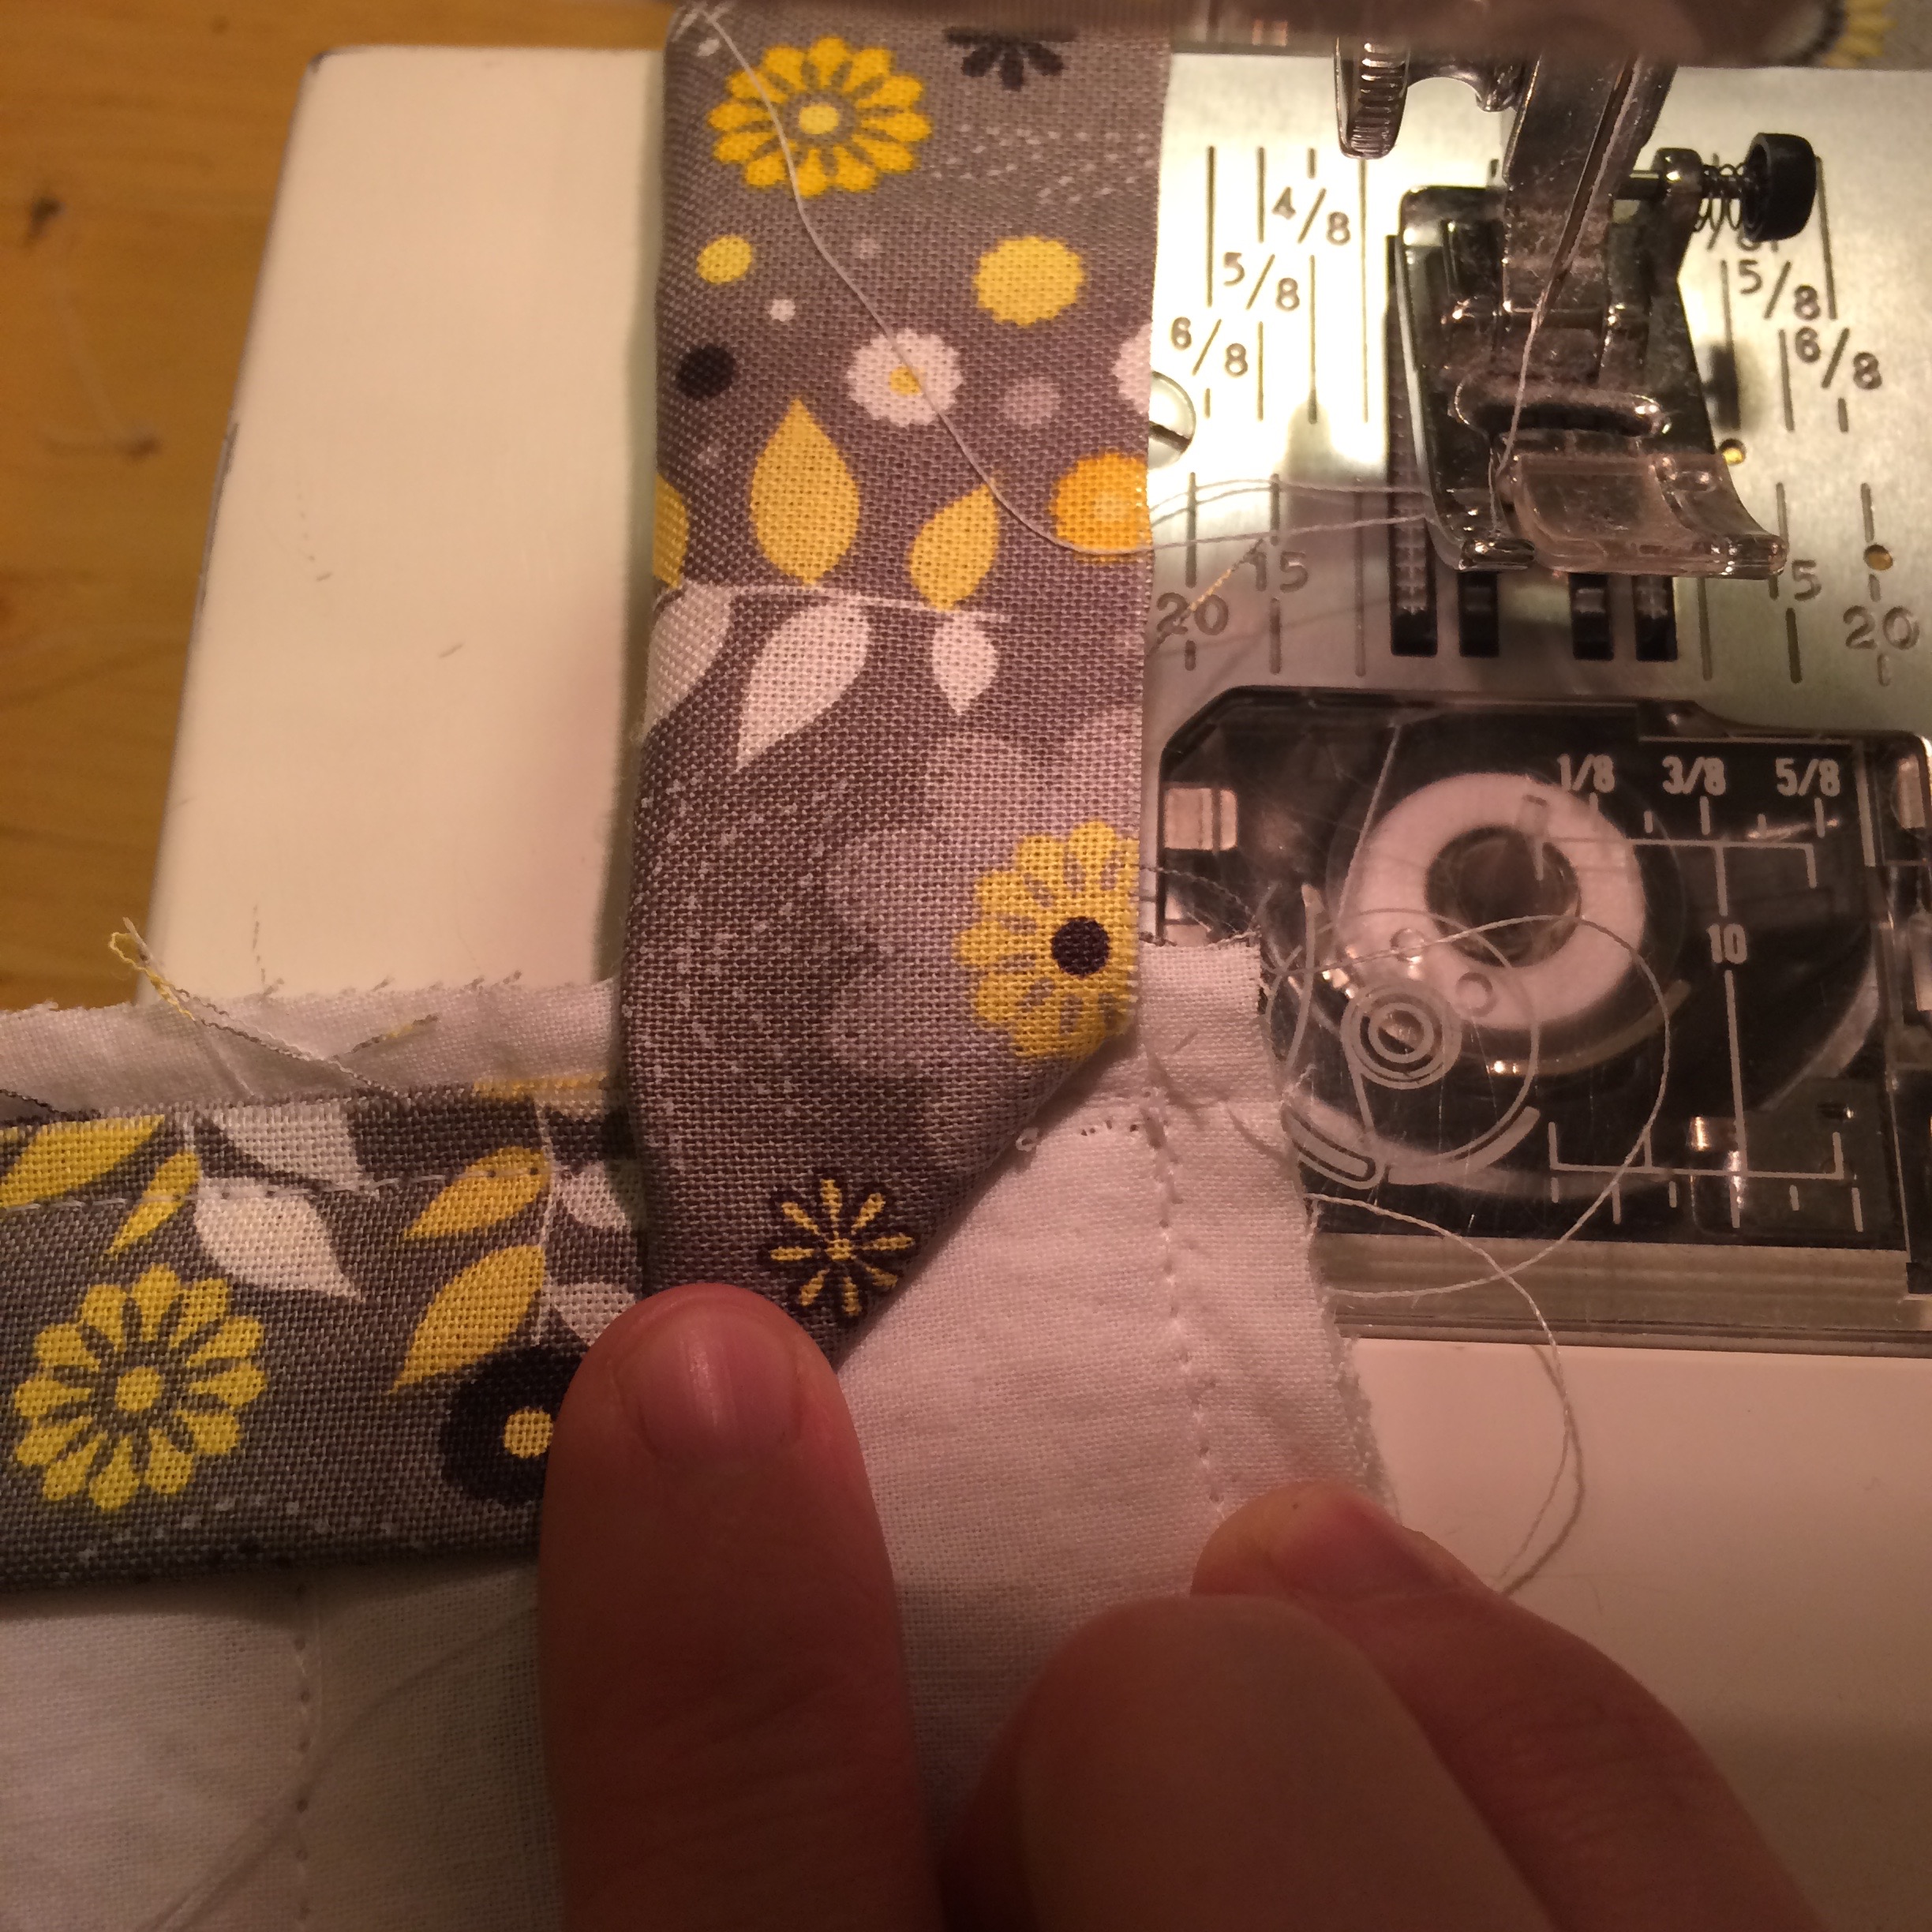
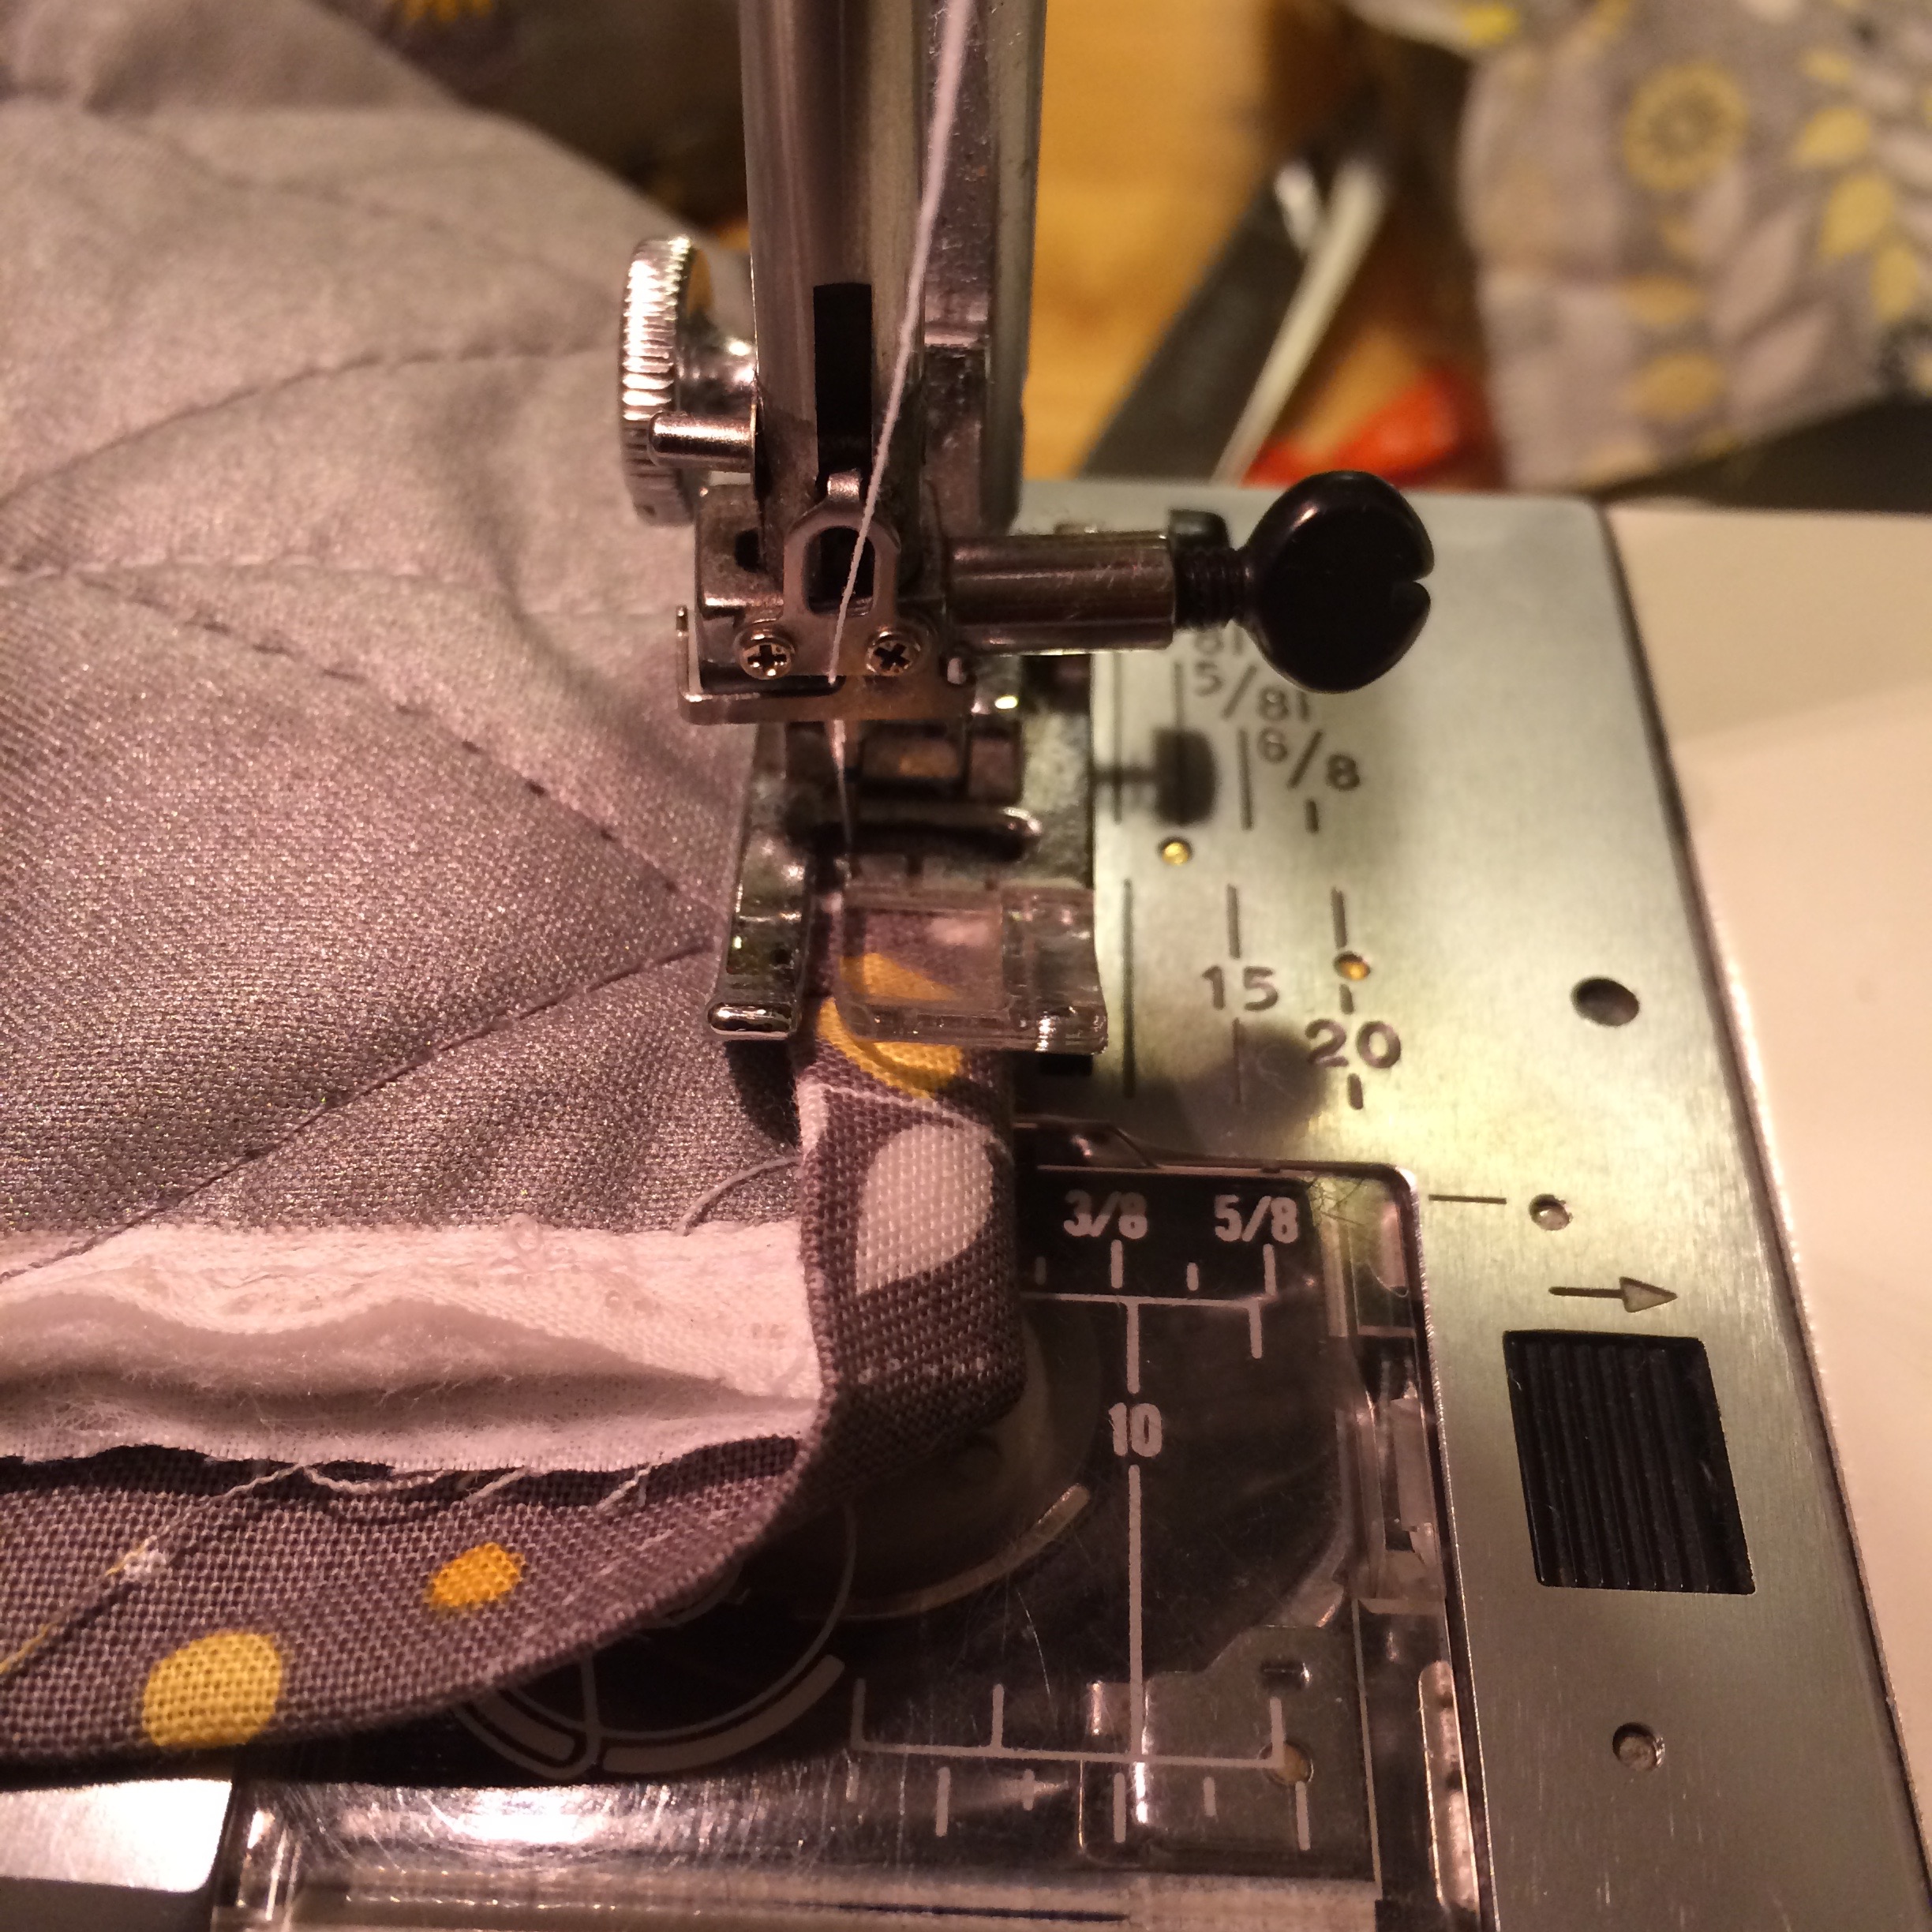
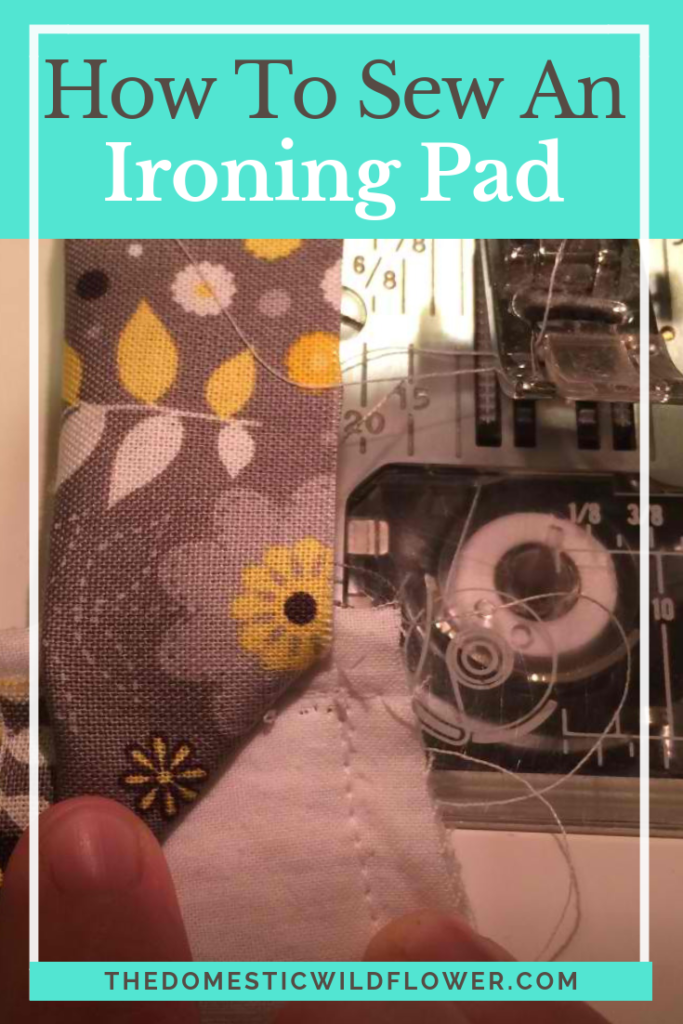
 How to Sew an Ironing Pad In this tutorial, I’ll show you how to sew your own ironing pad and avoid hauling out a cumbersome ironing board next time you need to iron. This ironing pad tutorial is beginner friendly, and the result is space saving and customizable. When I was brainstorming this post, I thought a lot about how infrequently some people iron. Ironing can be a pain for a few reasons and one of which is the ironing board. They are big, awkward, and mine is so noisy I would never iron when my kids were napping, ever, for fear of waking them. This little sewing project will result in an ironing pad that you can use (quietly!) on the floor, on the top of your washer or dryer (thanks to the magnets sewn in) or on the dining room table. You can roll it up or fold it like a blanket when you are done and stow it away. I think it would be a great gift for a college student. Sew on, Wildflowers! This post may contain affiliate links. All opinions are my own. Feeling inspired? Sign up for weekly crafty tutorials!You will need:  The amount you buy is up to you. I bought a yard and a half because I didn’t know what my plan was exactly and when I got it home I realized I could cut it to fit on top of my washer and dryer exactly but then I’d be wasting an awful lot of fabric. While you could use the left overs for potholders and cute, quilted trivets, I thought it would be more useful for my ironing needs while sewing to keep it nice and big. Whatever you decide, you need a piece of backing material the same size. I may never say this again, ever, but I have to advise you to NOT purchase cute colorful fabric. Ugh. I hated typing that. Choose white fabric, an old white or cream sheet, or unbleached muslin. If you chose a super cute red print for the other side, time plus the heat and steam of the iron could result in the dye seeping up through the silver fabric and staining your ironing project. I know it seems unlikely but it could absolutely happen. And of course, it would happen when you were ironing a white button down to wear for a job interview happening in an hour. Choose wisely, Wildflowers. If you are shopping online, you can order this bleached muslin from Joann’s. The final bit of fabric required is binding. This is where you can choose something cute and colorful. I used less than a quarter yard to create 2-inch wide binding that went all the way around the yard and a half of ironing board fabric. To determine the yardage for any binding, measure the perimeter. Divide that number by the width of your binding fabric. That number will be the number of strips you should cut off your binding fabric. For example: My perimeter is 54+45+54+45 = 198 inches. I will divide that total by 44 inches (as that is the width of my binding fabric) to get 4.5. That means I need 4 and a half strips of 2 ½ inches wide. Then I can multiply 2 ½ by 5 (since I will cut 5 full strips and just have some left over) which = 12.5. Thus I need 13 inches of 45-inch width fabric to make my binding. Procedure: Lay your muslin or plain cotton fabric on top of the white side of the ironing board material. Smooth it carefully and make pin edges. Sew all the way around the edge at a quarter inch seam allowance. Trim any excess, including extra batting that may have escaped the inside of the ironing board fabric. Optional Magnets: I wanted to add magnets to my corners for when I want to put the pad on top of the washing machine. These are the magnets I used, and I used 8 total. I sewed a square in every corner of my pad, plus in the middle of each edge. I made the square about 2 ½ by 2 ½ inches, but you want there to be plenty of room for your magnet. Sew the square and then use a seam ripper to open up the outside edge just enough to slip the magnet in and then sew it back up. Make your binding by cutting your strips, sewing them right sides together, pressing those seams open, and pressing the whole long strip in half hot dog style. Binding: You will now be learning or practicing how to bind. I bind all my quilts this way and if you ran into trouble, a quilter friend could easily help you with this step. Leaving a 4+ inch ‘tail’, sew the binding to the sandwich you’ve created of the ironing board cover and the muslin. All the raw edges will be facing the right, as indicated in the photo. Binding a Mitered Corner: This sounds hard, but it isn’t. As you approach the corner, stop a ¼ inch from the edge and backstitch. Pull the pad out of the machine, cut the threads, and turn it a quarter turn counterclockwise, so you will be “driving” down the next side.
Want to learn to sew? This is the course that I recommend and love! Pull the binding (which will be a really long strip, up and back, like in the photo above, so it is creating a straight line with the road on which you will be driving. The binding will be back behind your sewing machine. Hold your finger on that 45-degree fold and with the other hand bring the rest of the binding toward you.
Press your fingers on top of that fold. Slide the corner under the needle of the machine and lower the presser foot.
Sew straight down the road. Repeat on all corners. When you are nearly done, and you are approaching the ‘tail’ of the binding, stop about 6 inches from the tail. You will fold the raw edge under about an inch and tuck the tail inside. Sew to create a complete perimeter and backstitch. Now, flip the pad over and roll the binding from the front to the back (or vice versa, it doesn’t matter which side you sewed it to initially) and sew it to the pad, feeling carefully with your fingers and trying to keep your seam either in the binding or in the ironing board fabric, but not both. In other words, be aware of what the other side will look like. It depends on how much extra fluff you have in the seam allowance; sometimes your binding can easily fold over and you have an easy time but if your binding is skinny and/or you have a lot of extra bulk in the seam allowance, it will be difficult to pull the binding around.
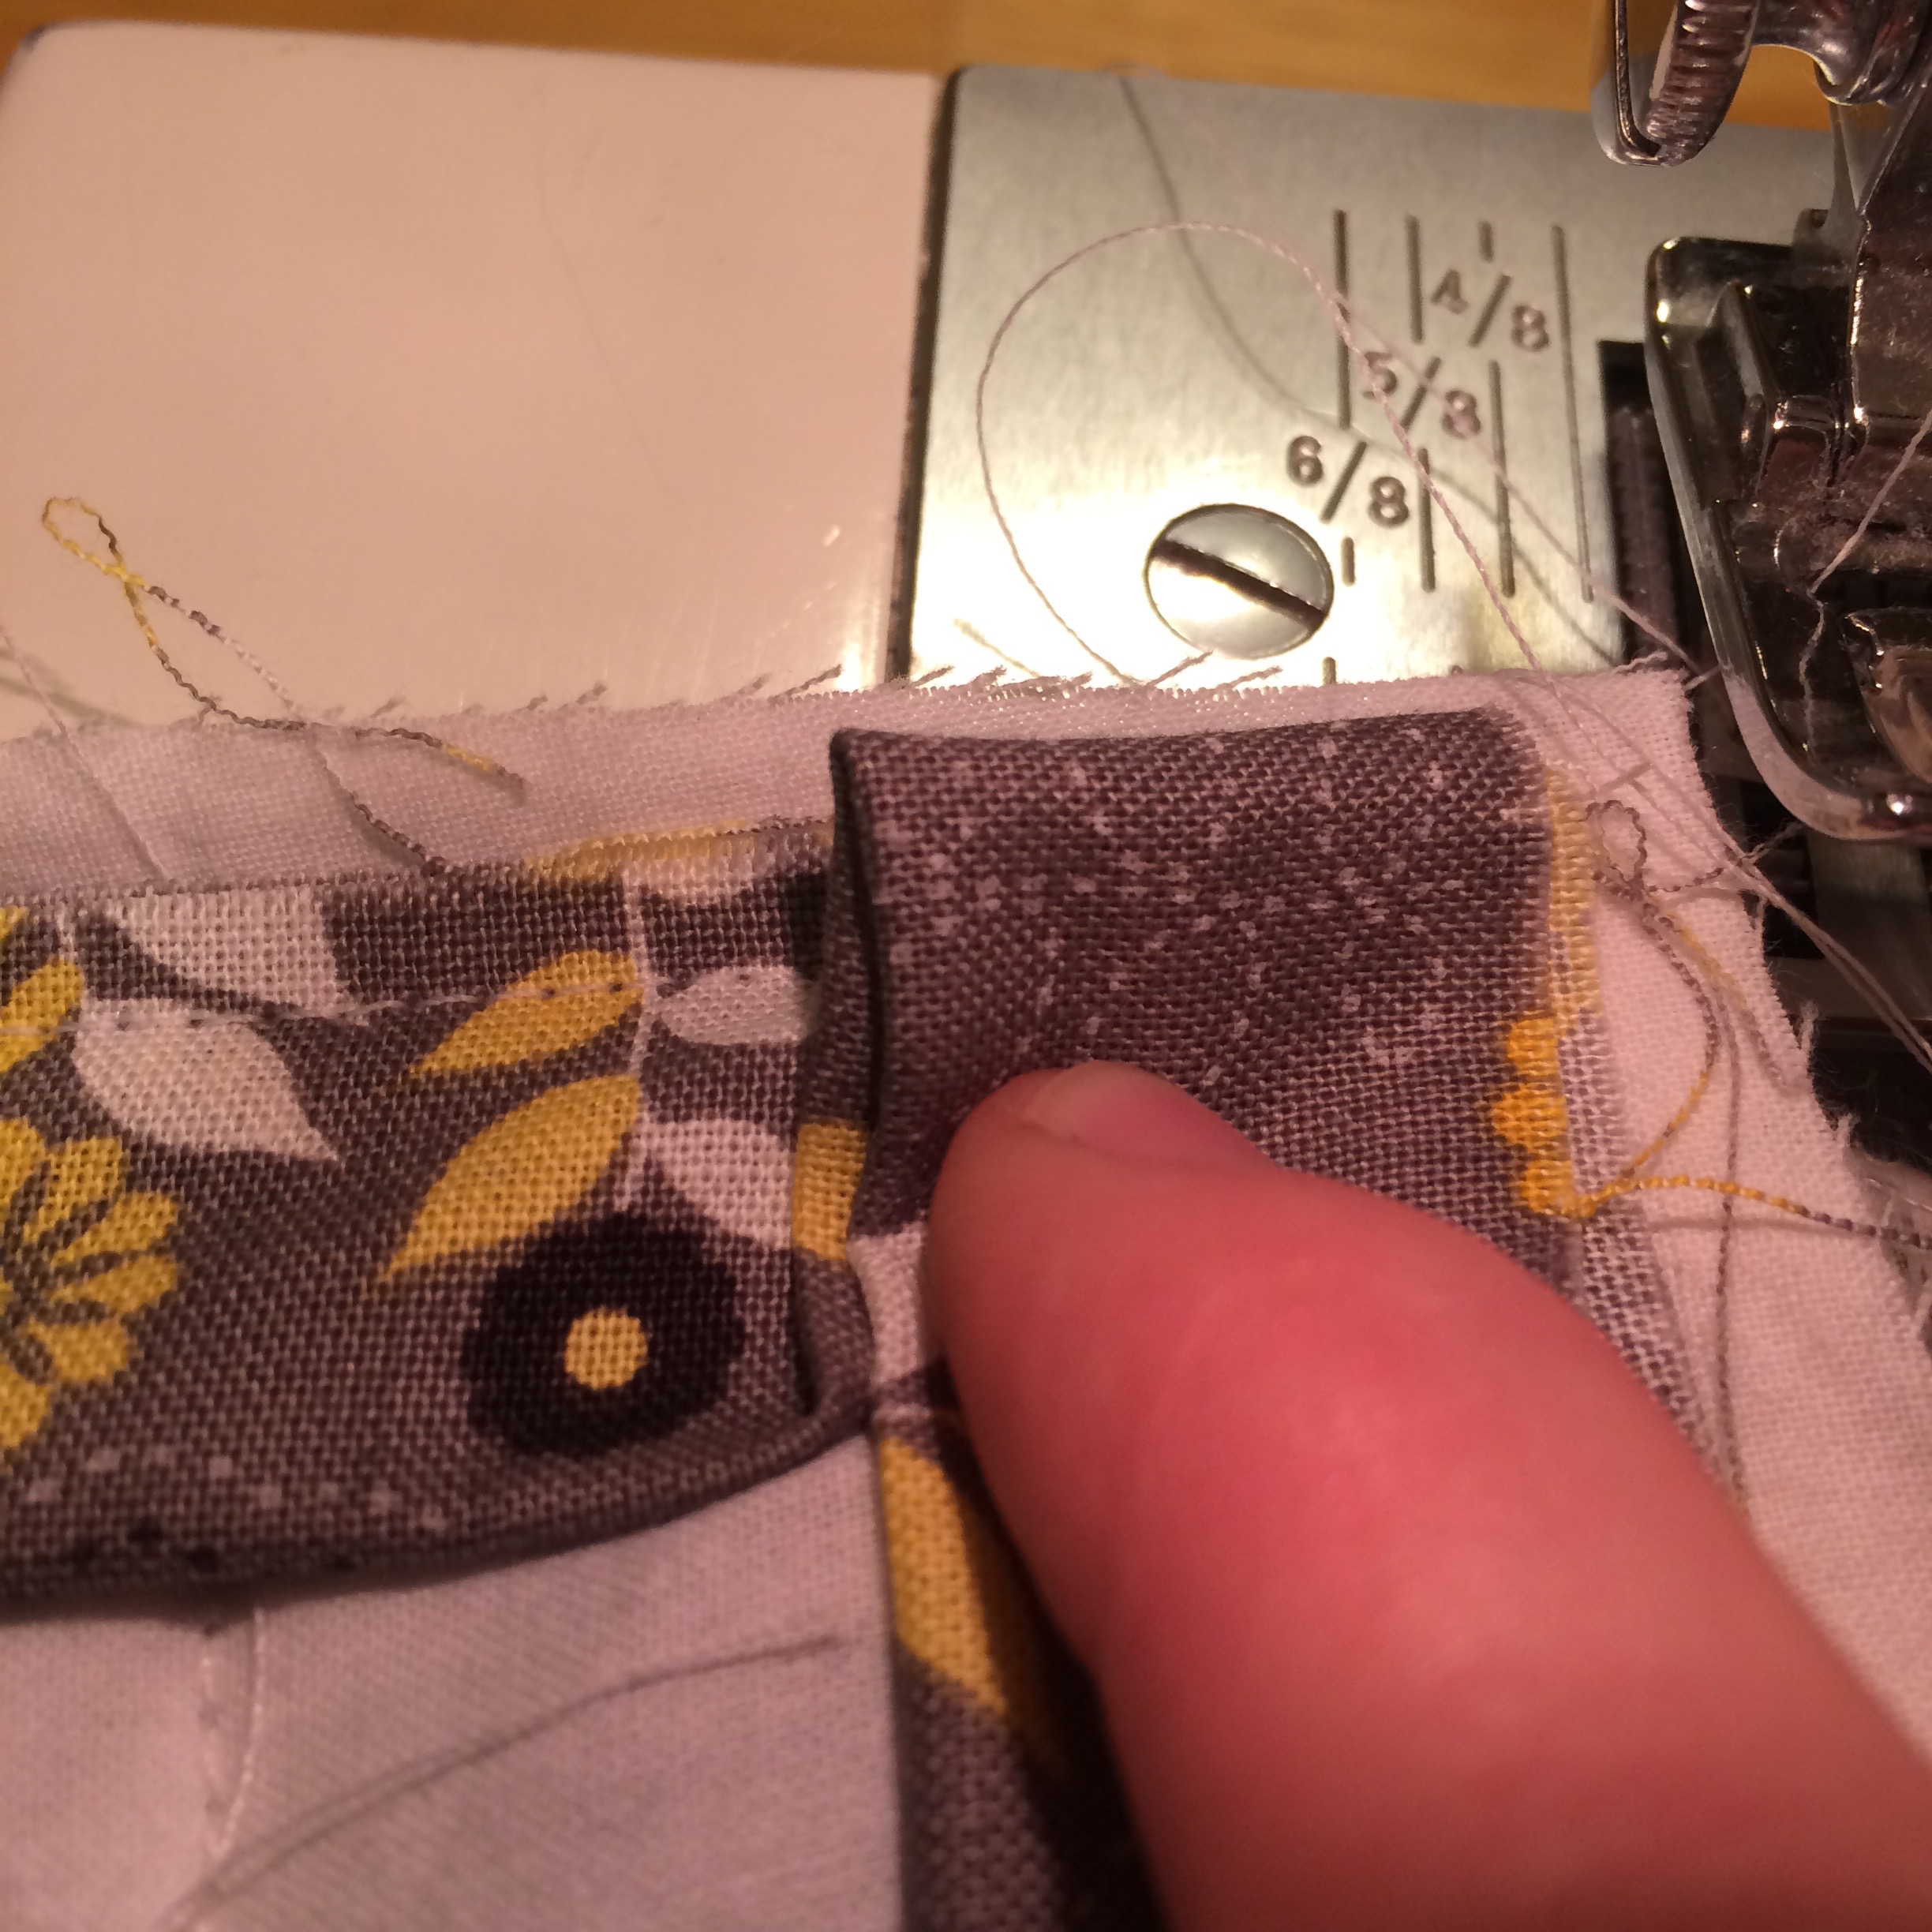
Sewing the mitered corner is a lot like wrapping a present. As you approach the corner, pull the extra toward you. Stop about a ¼ inch from the edge and backstitch. Cut the threads and pull the pad out and turn a quarter turn counterclockwise, just as you did the first time around.
To sew the mitered corner is a lot like wrapping a present. As you approach the corner, pull the extra toward you. Stop about a ¼ inch from the edge and backstitch. Cut the threads and pull the pad out and turn a quarter turn counterclockwise, just as you did the first time around.
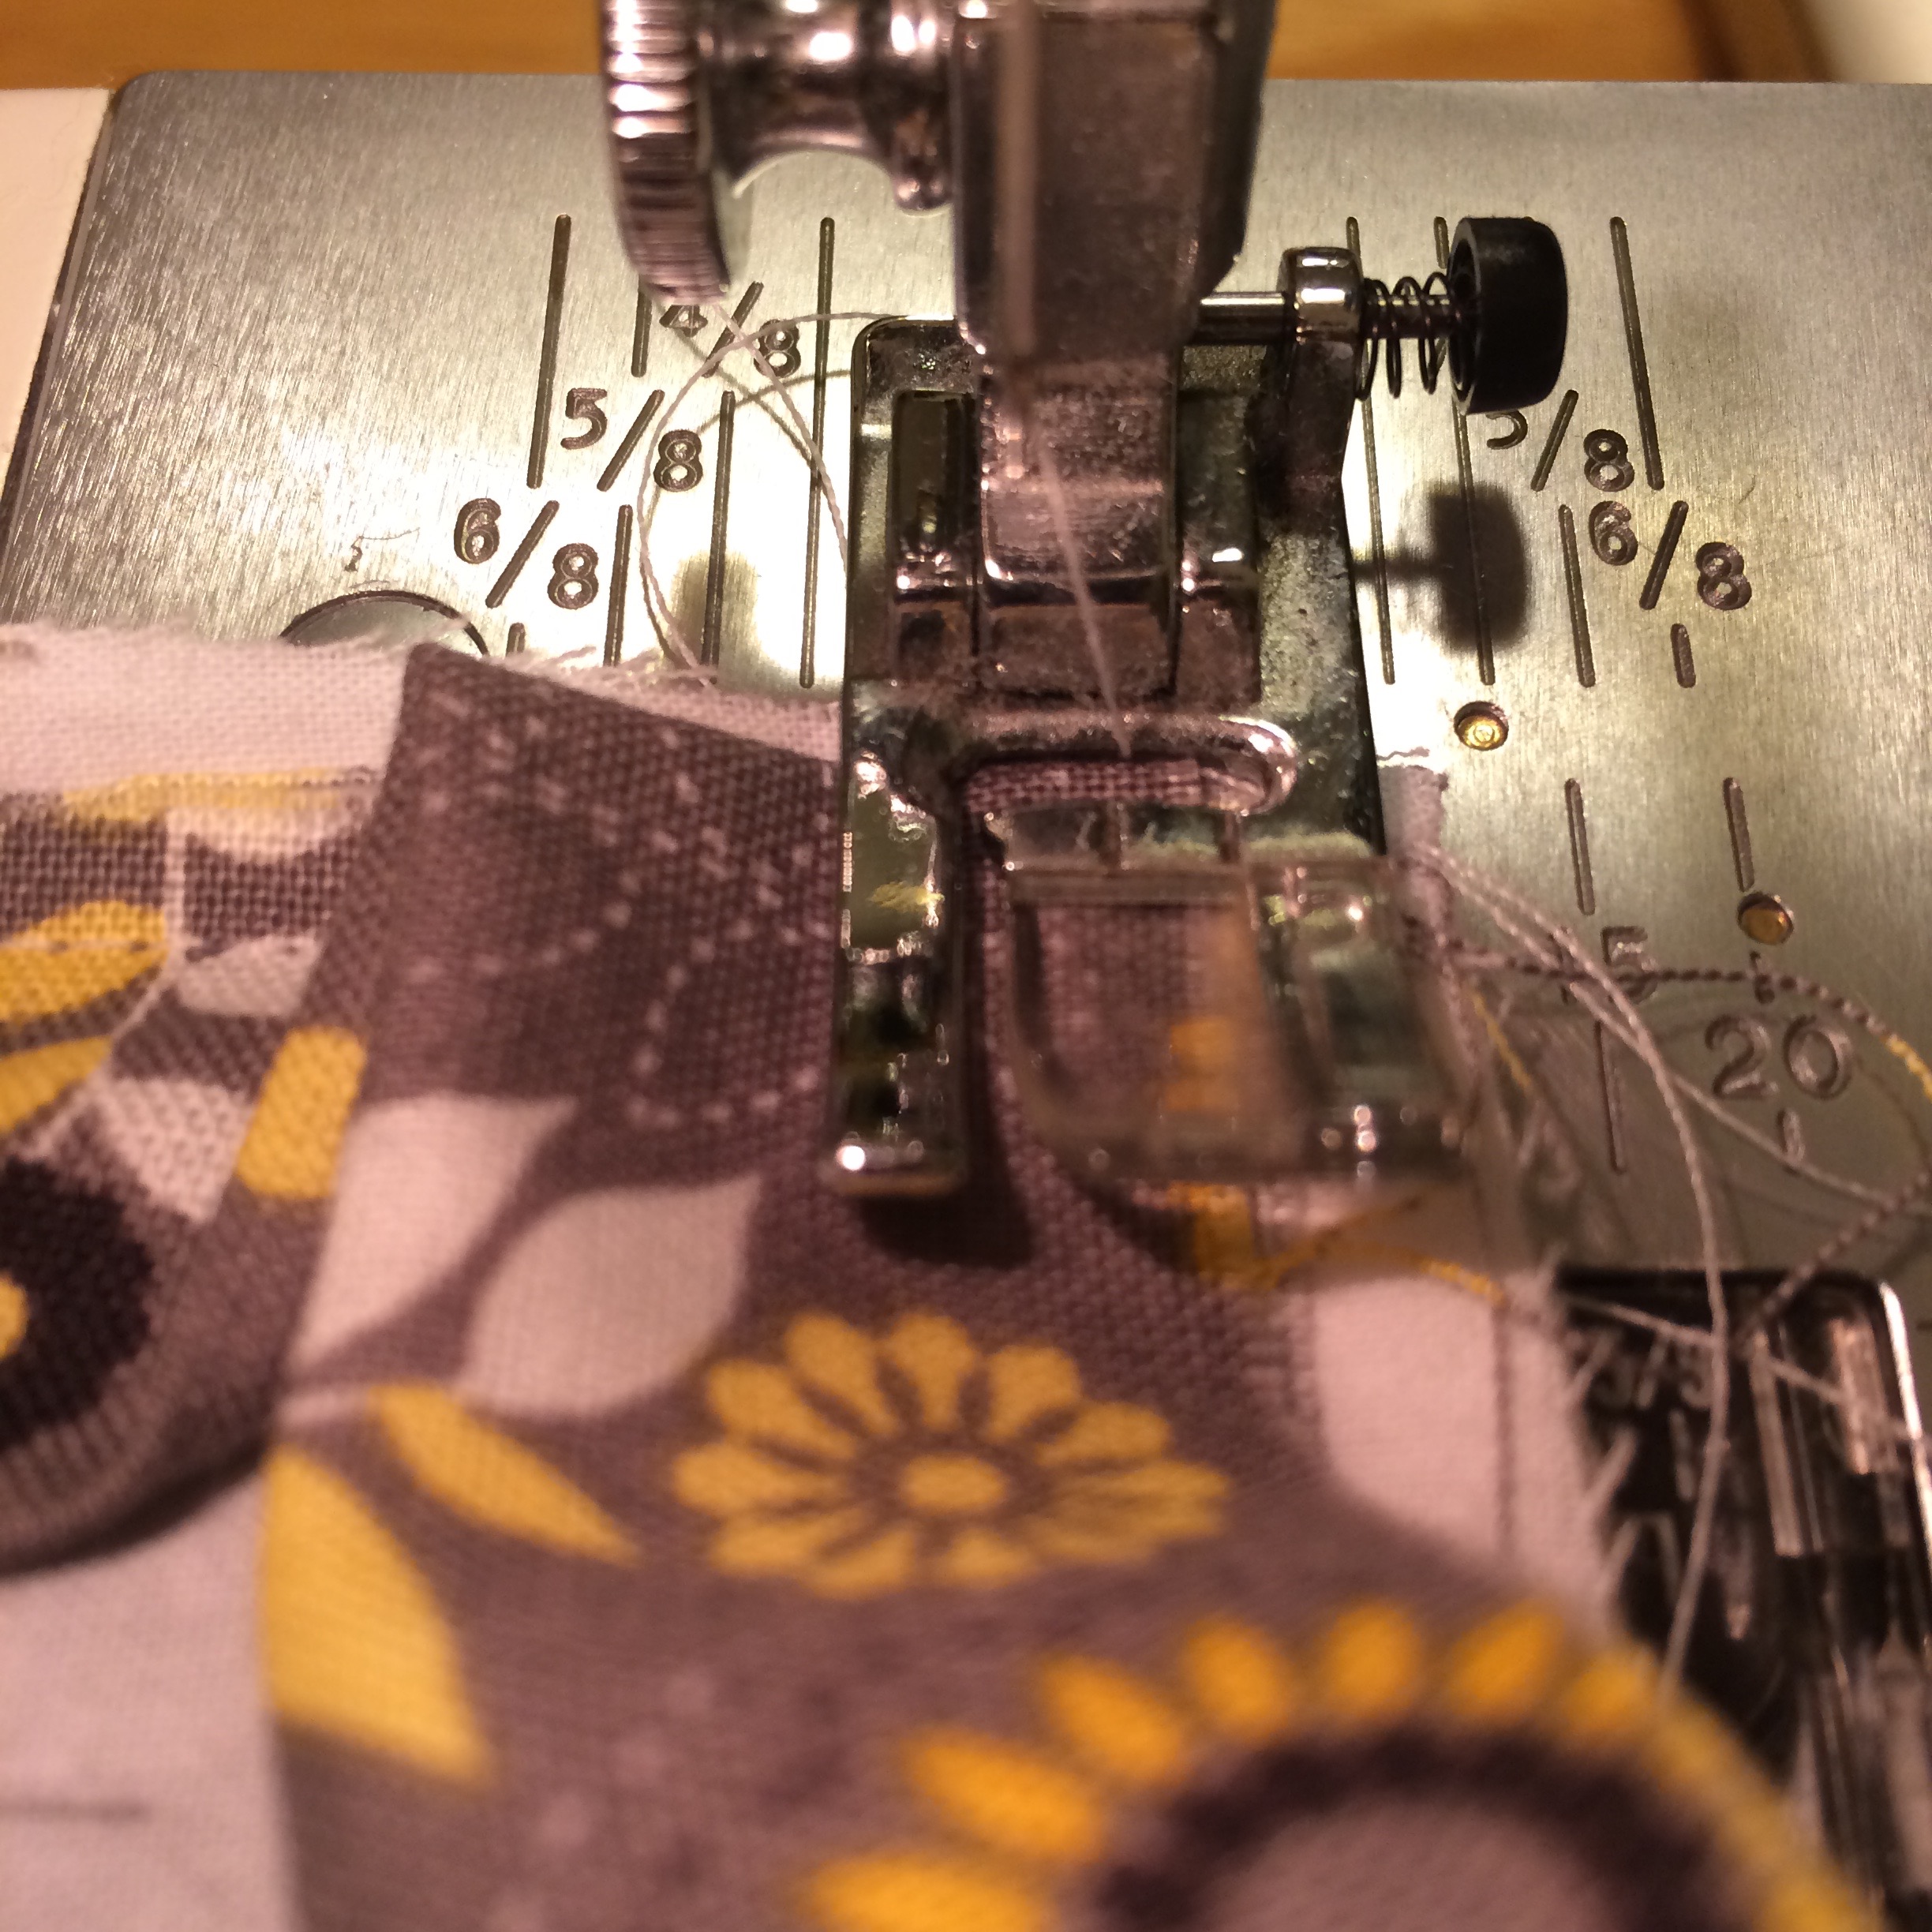
Fold the binding toward the left, and scoot the corner under the presser foot. This can be tricky because there’s a lot of bulk in the corner. If need be, trim the excess in the seam allowance, and use your hand wheel to get the seam started. There you have it! While going around the perimeter all three times may take a bit of time, the techniques you will use are fairly basic and the result is a very handy alternative to a heavy, noisy, clunky ironing board.
If you love helpful tutorials like this one, Subscribe and never miss a weekly post!If you want to learn how to sew, check out the courses HERE!I’d love to hear what you think, Wildflowers! Please share in the comment section below other uses for ironing board fabric! |
Handmade Food & Craft Tutorials for Beginners

Footer
Shrubology Ebook

Leave a Reply